Scenario: if my company has different salesman and I want them to only be able to view their own created invoice or quotation.
If your company has different salesmen and you want them to only be able to view their own created invoices or quotations, the Owner feature is the perfect solution. This ensures data privacy and allows each team member to focus only on their respective accounts.
Learn How To:
Use the "Owner" attribute in documents
Understand global document sharing
Customize sharing views at the user level
1. Understanding the "Owner" Attribute
Every document created (e.g., Invoice, Quotation, etc.) now includes an Owner attribute to track responsibility.
Step 1: When creating a document, locate the Owner field.
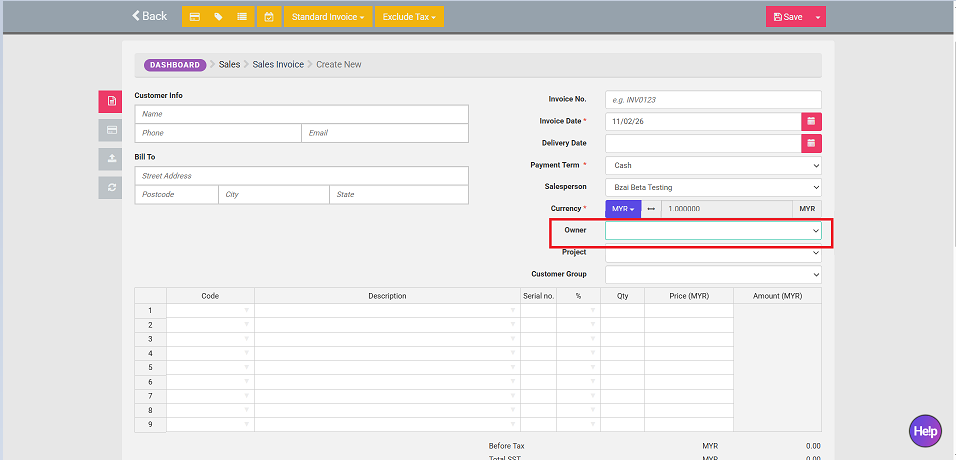
Step 2: Assign a specific salesperson or user as the owner.

Note: If left blank, the system will automatically assign the document to the currently logged-in user. (eg: Salesman A logs in and creates an invoice; he is automatically the Owner).
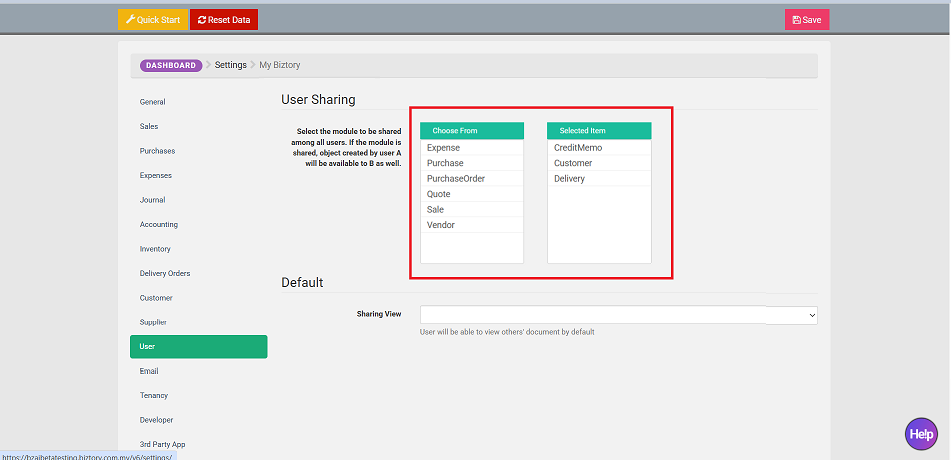
2. Restricting Access via User Sharing
To ensure salesmen only see their own work, you must manage the sharing permissions.
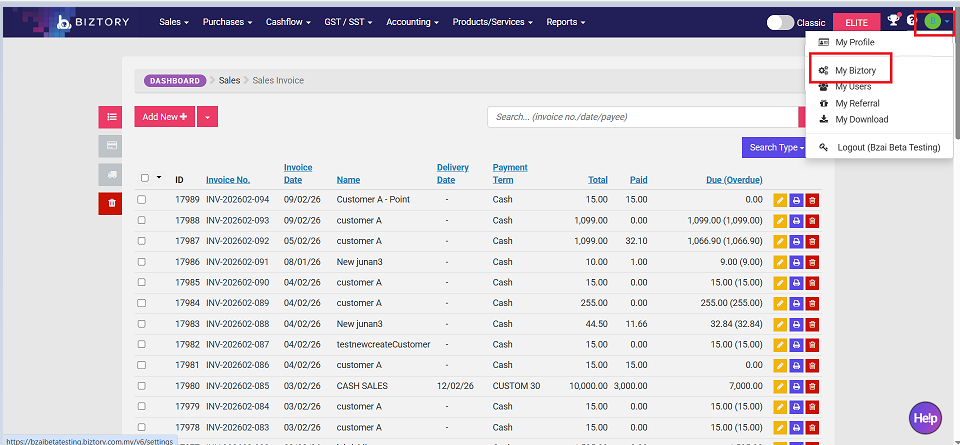
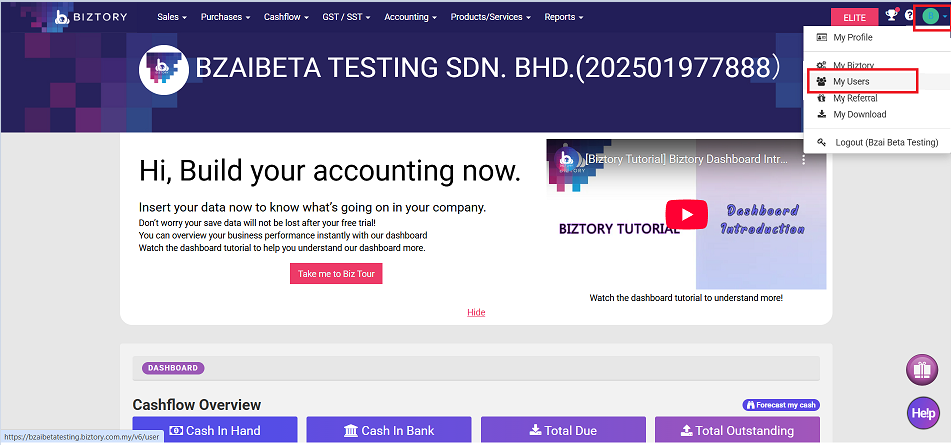
Step 3: Go to My Biztory > User > User Sharing to configure default settings.
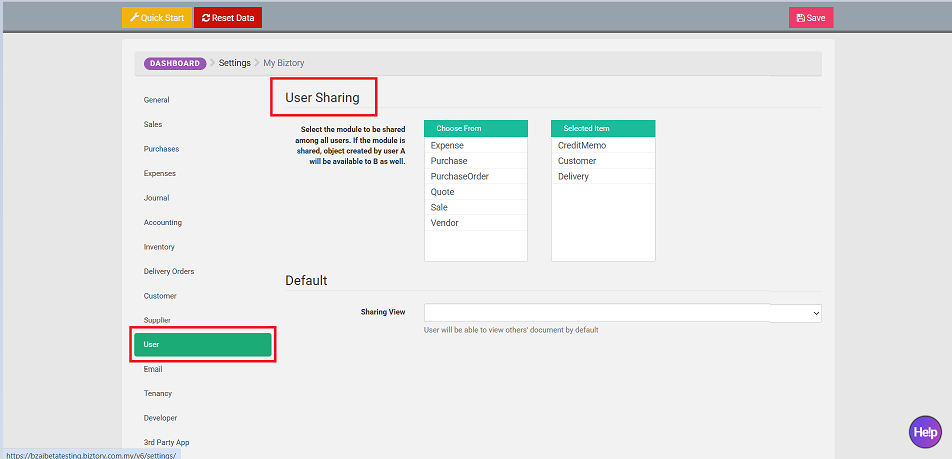
Step 4: If Sharing View is disabled, users can only view documents where they are the designated Owner.
Exceptions: Users with the Admin role or those with User Sharing enabled will still be able to see all documents.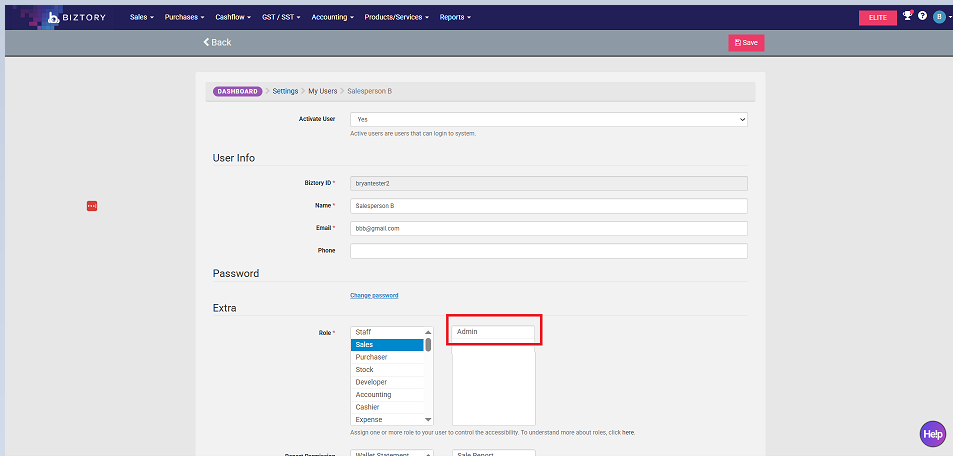
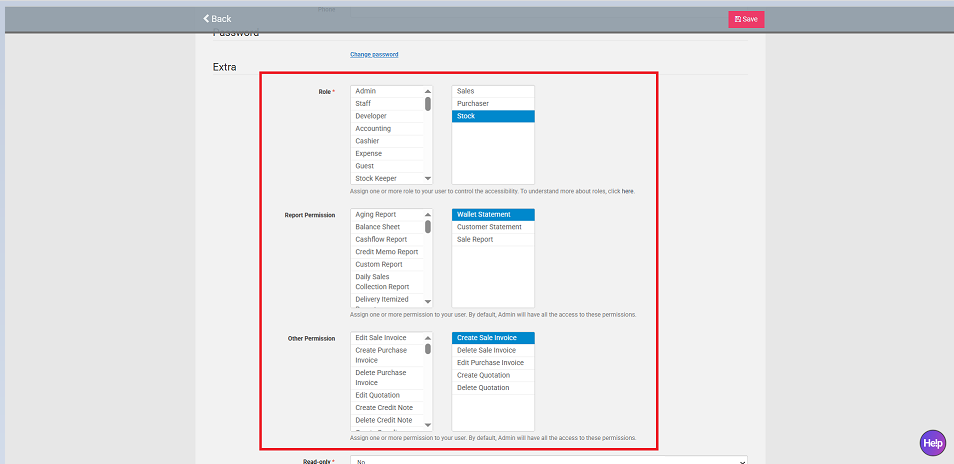
3. Customizing Permissions for Specific Users
You can override global settings to give different access levels to different staff members.
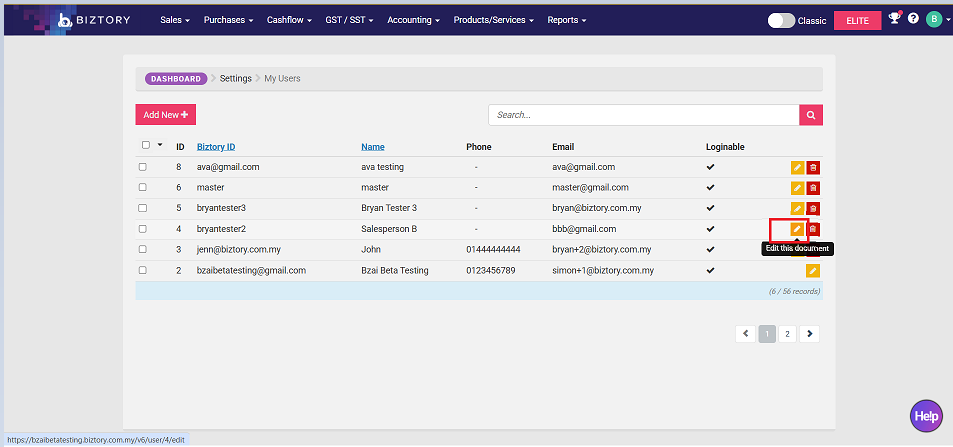
Step 5: Navigate to Profile > My Users.
Step 6: Click Edit on a specific user.
Step 7: Set Sharing View to "Yes" or "No" depending on your needs.
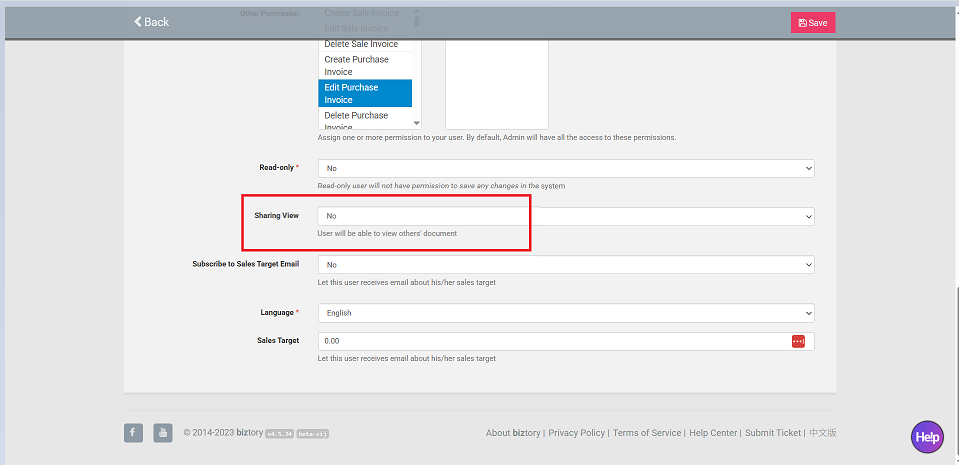
Example: Set to "No" for a salesman so they can only see their own invoices.
Example: Set to "Yes" for a manager so they can see customer lists or documents created by the Owner.
Step 8: Customize the Role, Report Permission, and Other Permission settings to ensure the user’s access aligns with their specifically designed permissions.
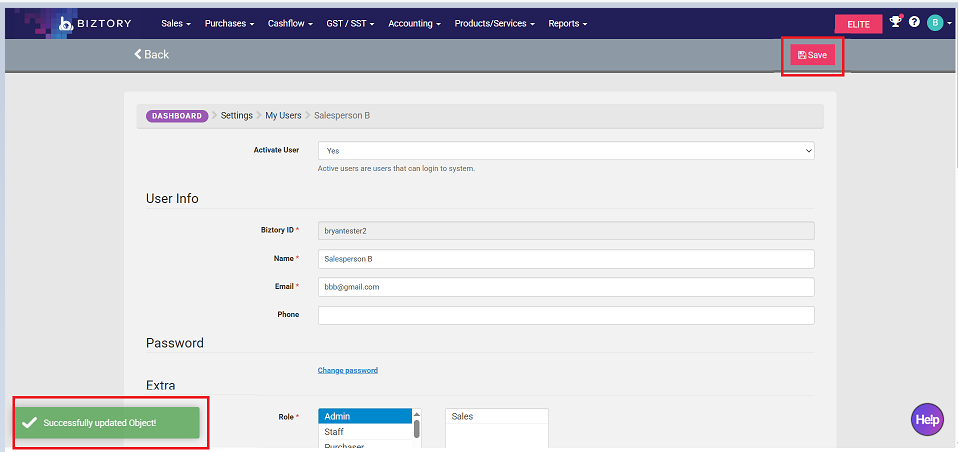
Step 9: Click Save and wait for the system to update until you see the green notification "Successfully updated Object!".
You’re All Set! By correctly assigning "Owners" and toggling the "Sharing View," you can maintain a secure environment where salesmen only access the data relevant to them.
Was this article helpful?
That’s Great!
Thank you for your feedback
Sorry! We couldn't be helpful
Thank you for your feedback
Feedback sent
We appreciate your effort and will try to fix the article